Monday, October 23, 2006

Classic Movies

I must admit, I am a sucker for old horror movies, especially the Universal Monster movies.

This weekend I was able to see one of the cheesiest, corniest, and yes, one of my favorite movies featuring three of Universal's Monsters. Abbot and Costello Meet Frankenstein was the first of many encounters Abbot and Costello have with other Universal monsters, but in my opinion, the best.
A plot summary from IMDB:
The world of freight handlers Wilbur Grey and Chick Young is turned upside down when the remains of Frankenstein's monster and Dracula arrive from Europe to be used in a house of horrors. Dracula awakens and escapes with the weakened monster, who he plans to re-energize with a new brain. Larry Talbot (the Wolfman) arrives from London in an attempt to thwart Dracula. Dracula's reluctant aide is the beautiful Dr. Sandra Mornay. Her reluctance is dispatched by Dracula's bite. Dracula and Sandra abduct Wilbur for his brain and recharge the monster in preparation for the operation. Chick and Talbot attempt to find and free Wilbur, but when the full moon rises all hell breaks loose with the Wolfman, Dracula, and Frankenstein all running rampant.


Definitley try to catch this movie on some of the calssic movie channels if you can. I know my Halloween season isn't complete without it!


© 2006 Haunted Yard

Thursday, October 05, 2006

Halloween Weekend-Continued

Saturday was spent helping my mom set up her yard haunt in the morning, and the afternoon was spent doing some much needed repairs on some existing props.

Boris the Butler got a little latex repair to his face with some liquid latex and old pantyhose. He's looking as handsome as usual:


My haunted tree also got a fresh coast of Monster Mud:

Before:


After:


Sunday, I set up my yard with the help of my mom.
Two new additions to my yard are simple T-frame props made with 2x4 ands PVC pipe.
Grim was made with the addition of a chicken wire ribcage, a foam skull, some hands from Anatomical Chart Company and a robe made from black sheets and pillowcases from the clearance aisle at Wal-Mart.


The witch, I've affectionately named Elfaba from the book Wicked, was made with a wig form with a little paper mache face,


hands from a pair of store-bought monster hands I painted to match:


and an old costume from a few years ago. I taped her hands to the stir-stick using mounting tape. The cauldron is spilling over with cotton batting and the sticks and vines are woven with orange lights to resemble fire. I really wish I would have been able to find a turn table to make her animated, but that will just have to be a project for next year.


Design Toscano had the coolest year swimmer this year, and I couldn't resist!


I'll continue to post pictures from the yard as the leaves start to change and the holiday draws near.

Happy haunting!

© 2006 Haunted Yard

October Already?

I wanted to post an update about my October 1st Halloween set-up, but it was a busy weekend followed by a nasty cold, and it didn't get done as soon as I had hoped.
I'll just jump right into it, then!
I spent most of Friday putting up the faux-stone walls in the entryway. I also set up my mad scientist/apothecary corner.


Also in the entryway, I set up my Lemax Spooky Town, complete with the new background I painted this year.


I also set up a fortune teller's table:


The dining room saw the addition of a zombie bride and groom:


and the living room was similarly haunted:


© 2006 Haunted Yard

Thursday, September 21, 2006

Setting a Spooky Table

A spooky tablescape can set the perfect mood when entertaining. Whether you plan an eerily elegant dinner or a fun costume party for kids or "groan"-ups, these ideas are sure to be a hit.

There are a wide variety of Halloween-themed tablecloths on the market, but most are the vinyl variety and too cutesy for my taste. One of my favorite table cloths came from having some extra cheese cloth around the house.

I started with a piece of cheese cloth just big enough to fit on my table. I brewed some strong coffee (tea works as well) and soaked the cheese cloth in the brew. I let the cloth dry for a few hours and then make random cuts and tears to simulate old, decayed thread-bare fabric. The table cloth looks nice over a dark colored under-cloth.

These coffin-shaped utensil holders add a perfect haunted feel to the table. You can use them for silverware if you are serving food to your guest’s buffet-style, but they also make great boxes for party favors.

There are a million different centerpieces for a Halloween table, but nothing set the mood for me like candles. Illuminations has a nice selection of Halloween and fall themed candles and accessories. Two of my favorites this year are the Spooky Candelabra,

and the Floating Skull Centerpiece,


No party would be complete without the food! For the largest collection of Halloween recipes I've some across online, be sure to check out Halloween Food Group on Yahoo Groups. Also, Martha Stewart has a great collection of drink recipes for all ages. Last year, I opted to buy Vampire Wine from Vampire Vineyards. While I didn't love this wine, it was a fun wine to have for Halloween, and I saved the bottles for decorating this year.

Happy haunting!
© 2006 Haunted Yard

Friday, September 08, 2006

More Halloween Goodness

While shopping the other day at an unnamed retail giant, I came across this:


Waves of excitement washed over me, and I think the sound that may have come out of my mouth was "SQUEEE!"
I loved Roseanne's Halloween episodes, and looked forward every year to watching them in syndication. I am so excited to be able to watch them whenever the haunting mood may strike!


© 2006 Haunted Yard

Tuesday, August 08, 2006

Weekend Projects

This past weekend, I went shopping at what our local community calls "Crazy Days." All the local business have huge sidewalk sales, and there are all kinds of goodies to be found, especially when I am in the Halloween mindset.

I found a very cute cat chinea that I thought was really cool, but he lacked the Halloween flair!


I gave it a good coat of black spray paint and transformed it into a Halloween cat. I love the contrast between terra cotta color on the inside, and the new coat of black paint. Much more Haloween-ish!


I also found a very country-looking decoration that had been damaged. I'm actually not sure what it was supposed to be (bird house, maybe?), but I got a great deal on it since the rooster weather vein on the top was broken and the hinged door was loose.


I love the gothic elements to on the piece, so I decided to give it a coat of fleckstone paint and add some gargoyles to it. I think it will make a nice candle holder that I will probably leave out year-round.


The last project I worked on this weekend was a skull chadelier. I started with a candle plate, a chain plant holder, 3 votive holders and 3 little skulls that I aged with brown paint. I think it turned out pretty well. I'll hang it in the entryway this Halloween.


© 2006 Haunted Yard

Wicked Witch of Wyoming?

During my daily obsessive search for new prop ideas, I came across this witch from the Brewster Yard Haunt website.

I really love this witch, and think that the plans look wickedly simple, and the results are wickedly effective!

While I think animatronics and animated props are very cool, especially if they are homemade, I just don't have the skill to make some of the animated props I see online. I'm a geologist; a rock-nerd, not an electrical engineer. But this witch, being run by an old turntable, well, that's right up my alley.

So, this weekend, I think I will begin gathering the supplies needed to build my very own cauldron-stirring witch. I'll hit the thrift stores and yard sales for an old turntable, and if that fails, I'm sure dear old dad has one stashed in his garage.

The only thing I will need to brainstorm is how to make this weather proof. Wyoming's weather is unpredictable, especially in late October. I'll need to make something that will hold up to any potential snow or inclement weather we may get.

Of course, I'll be updating the blog with my progress on this very cool prop, so stay tuned!

© 2006 Haunted Yard

Sunday, July 30, 2006

Birth of Boris!

I love to craft, and one of my favorite Halloween craft books is Halloween Crafts: Eerily Elegant Decor written by Kasey Rogers (Louis Tate from the TV show Bewitched). In this book, she gives ideas for decorating your home for Halloween in pretty unique and innovative ways. There are gourd crafts, recipes, clip art and invitations, and simple, yet effectively, haunting props.

This book was the inspiration for my Butler prop. In the book, they name their butler Gravely, but I thought Boris was a much better name for mine.

The prop was easy, and inexpensive to make. I used some lumber my pack-rat dad had lying around, an old man mask, a suit and shoes purchased from a thrift store, dollar store accessories, old pantyhose, and a bag of shredded paper.

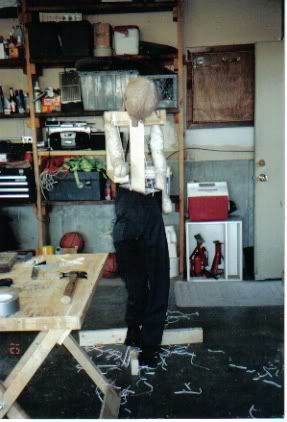
I first built a frame by cutting a 2X4 to the shoulder height I wanted my butler. I screwed four pieces of 2X4 cut to 18" lengths at right angles to the bottom of the larger piece to make a stand. This is the time you want to put his pants on! If you finish building the frame, there is no way to dress him. I slid one leg of the pants over the frame. Then, I stuffed an old pair of panty hose with shredded paper and used good-old duct tape to attach the panty hose to the frame. Boris now had "hips" on which his pants could stay up!

I screwed another 18" piece of wood to the top of the frame to make his shoulders, creating a T-shaped frame. Using flat brackets, I attached the piece of wood to the T-frame for his arm. Since I wanted him to be holding a tray, I screwed another piece of wood at a right angle to his upper arm. His other arm would hang at his side, so there was no reason to make an additional arm.

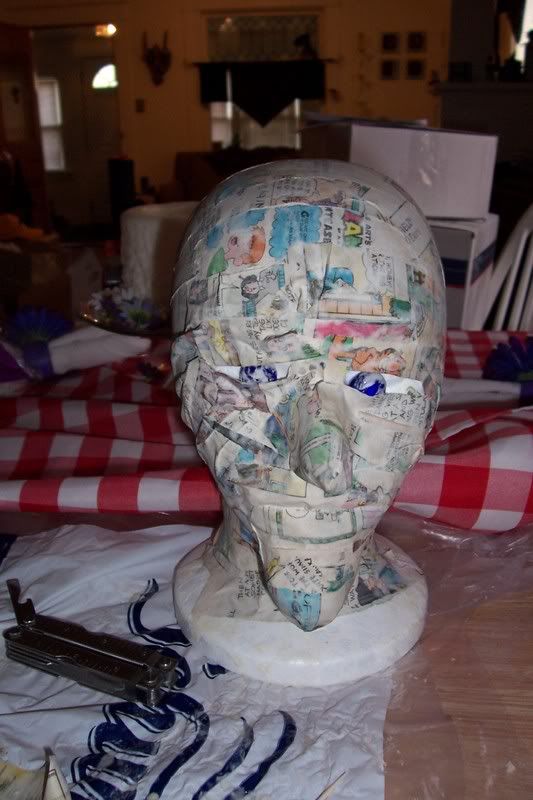
An old wire coat hanger was shaped into fingers which were glued into hole drilled into the arm. I used another pari of panty hosestuffed with paper to fill out his arms, and used the panty portion of the hose to stuff a head shape. I attached his arms and head to the shoulders with a staple gun.


Before dressing him, I gave him a slight hunch-back by stuffing a few plastic grocery sacks and taping them to his shoulders. I dressed him in a pin striped thrift store suit with a bow tie. I put some gloves on his wire fingers, stapled an aluminum tray from the dollar store to his arm, and added his mask.


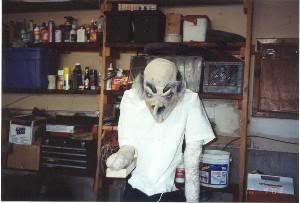
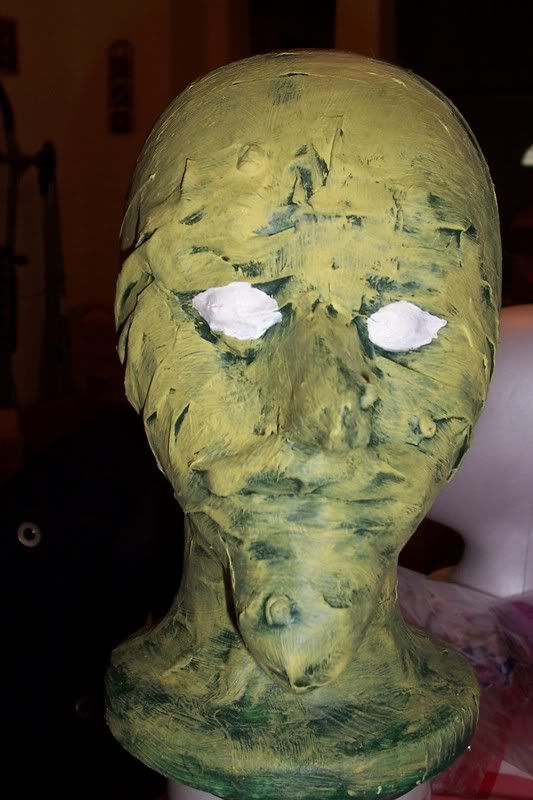
His eyes were made from styrofoam craft balls that I painted. They are a bit larger than the mask holes, but look really cool kind of bugged out.


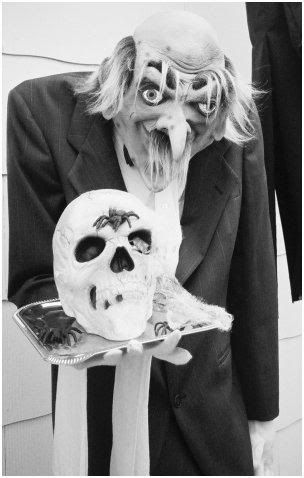
Boris is by far one of my favorite props. He's so lifelike, that he's startled many people; myself included!


© 2006 Haunted Yard

Monday, July 24, 2006

Welcome!

Welcome to my little haunted corner of the blogsphere.

The Haunted Yard will be a one-stop blog for the Halloween enthusiast: from the seasoned yard haunter to the novice Halloween decorator, there will be something for everyone.

I'll bring you tips to turn your home and yard into a zombie's paradise. I'll show you my favorite books, websites, crafts, and prop resources as well as show you some my own evil creations. Need a creepy recipe to gross out your party guests or trick-or-treaters? I'll have that! Need a great costume idea? No problem!

So welcome, and prepare for a scare!

© 2006 Haunted Yard